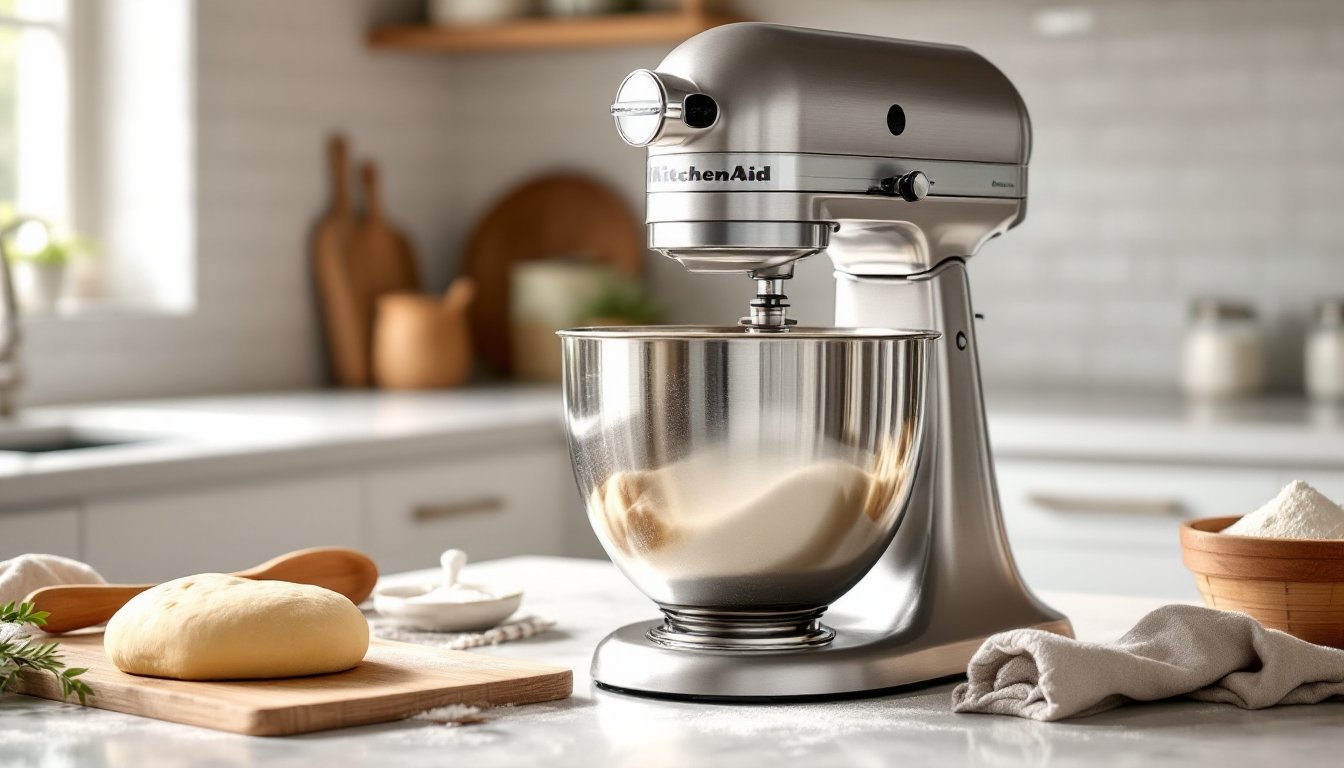
If you’ve spent hours hand-kneading bread dough only to end up with sore forearms and inconsistent results, a KitchenAid dough mixer changes everything. This isn’t just a fancy countertop appliance, it’s engineered to handle the heavy lifting that separates home bakers from frustrated amateurs. Whether you’re mixing rustic sourdough, tender brioche, or pizza dough for the family, the right stand mixer handles the mechanical work so you can focus on perfecting recipes and technique. For homeowners serious about baking, understanding how a KitchenAid mixer works and what to look for makes the difference between a kitchen investment that sits unused and one that becomes indispensable.
Table of Contents
ToggleKey Takeaways
- A KitchenAid dough mixer uses a direct-drive transmission and flat beater design that mimics hand-kneading motion, making it superior for handling heavy dough loads more efficiently than belt-drive competitors.
- Choose a bowl capacity based on baking frequency: 4.5-quart for occasional bakers (single loaves), 5-6 quart for weekly baking, and avoid commercial 8-quart models unless running a home bakery operation.
- Always start mixing on speed 1 for 10-15 seconds with dry ingredients, then progress to speed 2-3 for dough kneading, and never exceed two-thirds bowl capacity to prevent motor stalling and splashing.
- The KitchenAid mixer extends beyond bread to pasta, croissants, laminated doughs, and enriched sweet breads, transforming tedious hand-kneading into manageable 5-10 minute batches.
- Immediate cleanup after use, hand-washing attachments, and periodic carbon brush replacement keep your KitchenAid dough mixer functioning for 20+ years without performance degradation.
- Most common KitchenAid mixer issues—stalled motors, splashing, and dough tangling—stem from user error like overfilling or starting too fast, and are resolved by reducing batch size and using the splash guard.
What Makes a KitchenAid Dough Mixer Different from Other Stand Mixers
A KitchenAid stand mixer isn’t just marketing hype, it’s built around specific design choices that matter for dough work. The power, bowl size, and attachment design all factor into how evenly and efficiently the mixer handles dough.
The motor delivers consistent torque without bogging down under heavy dough loads. Most KitchenAid models use a direct-drive transmission rather than belt-drive, which means more power transfer and less slippage when working with thick, sticky dough. That matters when you’re pushing 5 pounds of bread dough or pizza dough through the kneading cycle.
The coated flat beater (often called the paddle) is wider and flatter than competitors’ versions, folding dough from the bottom while the bowl rotates. This action mimics hand-kneading motion more closely than traditional hook attachments on other brands. The spiral dough hook on KitchenAid units grabs dough more aggressively, reducing the need for manual intervention mid-mix.
Key Features That Enhance Your Baking
The tilt-head design makes adding ingredients or scraping the bowl simple, no pouring from above a stationary bowl. Stainless steel bowls resist scratches and dents better than ceramic or glass, especially over years of heavy use. The splash guard prevents flour clouds from coating your countertop, a small feature that makes a real difference in cleanup.
Speed control ranges from 1 to 8 on most models, letting you start low (to avoid flour explosions) and increase gradually. The bowl-lift mechanism holds the bowl securely without requiring clamping, which matters when dough is heavy and shifting during a 10-minute knead cycle. Accessories like pasta rollers, fruit presses, and grain mills transform the mixer into a multipurpose tool, though the dough hooks and beater handle 90% of what home bakers actually use.
How to Choose the Right KitchenAid Model for Your Baking Needs
Not every KitchenAid mixer suits every baker. The decision depends on how often you bake, what types of dough you make, and your countertop space.
Bowl capacity is the first filter. The 4.5-quart bowl handles roughly 3 pounds of bread dough comfortably, fine for a single loaf or two dozen cookies. Jump to 5-quart (the Artisan) or 6-quart (Professional) if you bake weekly or batch multiple loaves. The 8-quart NSF Commercial models are overkill for home bakers unless you’re running a cottage bakery operation.
Motor power ranges from 300 watts (Compact) to 1,000+ watts (Commercial). A home baker mixing pizza and sandwich dough doesn’t need commercial horsepower, but underpowered motors bog down visibly when handling stiff doughs like challah or brioche. The Artisan (a solid middle-ground at ~325 watts) handles most home dough projects without the premium price of Professional models.
Consider existing kitchen layout. KitchenAid mixers range from 14 inches (Compact) to 24 inches (Commercial). If your countertop is tight, the Compact saves 4 inches of width and actually performs well for smaller batches. Noise is a factor too, larger motors hum louder, which matters if your kitchen is open to living spaces.
Recent stand mixer reviews from Good Housekeeping and Better Homes & Gardens’ mixer comparisons both highlight KitchenAid’s durability and performance across models, helping narrow down which size and power level fits your baking style. Start by watching YouTube demos of the specific model kneading dough, seeing it in action beats spec sheets.
Getting Started: Essential Tips for First-Time Users
Your new mixer arrives, now what? A few habits established from day one prevent frustration and damaged batches.
Read the instruction manual, specifically the dough capacity chart. Overfilling is the #1 mistake that stalls motors or splashes dough onto the counter. The bowl should be no more than two-thirds full of mixed dough. Start with a batch that feels obviously small: you’ll develop confidence with the actual capacity over a few sessions.
Always set the bowl in place and lock the tilt-head before attaching the beater, dough hook, or whip. Unsecured bowls shift during mixing, throwing off balance and creating uneven kneading. Install the correct attachment for the job, the flat beater for mixing, the spiral dough hook for kneading. The wire whip is for whipping cream or egg whites, not dough.
Start on speed 1 for the first 10-15 seconds when dry ingredients are loose. Speed 2-3 handles most dough kneading without splashing. Jumping to speed 4+ immediately sends flour everywhere. Once dough forms a cohesive ball (usually 2-3 minutes on speed 2), you can increase to speed 3 for the final 5-7 minute knead. The dough should pull away from the bowl sides but stick slightly to the bottom.
Don’t babysit the mixer constantly, but check in at the midway point. If dough seems too dry (clinging to sides) or too wet (not pulling from sides), add flour or water one tablespoon at a time with the mixer running. Resist the urge to stop and stir manually, that defeats the purpose of the machine.
Maintenance and Care to Extend Your Mixer’s Lifespan
A KitchenAid mixer can run for 20+ years if treated right. Most failures come from neglect, not poor design.
Clean immediately after use, before dough dries onto the beater or bowl. Soak the bowl and attachments in warm soapy water for 15 minutes, then wash by hand. Avoid dishwashers for the attachments, they’re not designed for the heat and harsh cycles. The bowl is typically dishwasher-safe, but hand-washing preserves the finish longer.
Wipe the base and head unit with a damp cloth, never submerging it. Water in electrical components invites corrosion. Remove any dough splatter from the motor housing or tilt-head hinge. A dry brush cleans flour from crevices without spreading moisture.
Don’t force the tilt-head if it sticks. A small amount of food-grade lubricant (like silicone-based kitchen spray) on the hinge helps: avoid WD-40 or products not rated for food contact.
Store attachments in a dry drawer, preferably in a small plastic bag to keep them dust-free. The bowl can hang from its handle or rest flat, both are fine. Keep the power cord loosely coiled: tightly wrapping it stresses the insulation.
Replace carbon brushes if the motor quits powering suddenly after years of service. This is an inexpensive parts replacement (under $20) that extends the mixer’s life significantly. Authorized KitchenAid service centers handle this, and many DIYers can manage it with basic instructions.
Creative Dough Projects Beyond Basic Bread
Once you master bread, the mixer opens doors to other dough-based projects that typically require commercial equipment or serious arm strength.
Pasta dough is where many home bakers level up. A simple egg pasta (roughly 3 cups flour, 4 eggs) mixes to a stiff, smooth dough in 5 minutes on speed 2, which by hand takes frustrating manual work. Pair the mixer with a pasta roller attachment (sold separately) and you’re rolling sheets without a wooden dowel and a lot of regret.
Croissant and laminated doughs benefit from the mixer’s ability to develop gluten evenly, creating the structure that makes those flaky layers possible. Doughs like challah, brioche, and enriched sweet breads (loaded with butter and eggs) rely on the mixer’s steady torque, hand-kneading these rich, sticky doughs is a nightmare.
Cookie doughs and cake batters use the flat beater rather than the dough hook. The mixer creams butter and sugar in seconds, which develops emulsion faster than by hand. Sturdy doughs like oatmeal or snickerdoodle batches knead in under a minute, cutting prep time dramatically.
Pizza dough, ciabatta, sourdough, bagels, donuts, anything that requires kneading or mixing heavy batter is fair game. The mixer pays for itself the first time you batch out a triple recipe of bread dough for a dinner party.
Troubleshooting Common Issues and Solutions
If the mixer sounds strained or smells like burnt plastic, stop immediately. Most likely causes: overfilled bowl, dough too stiff, or a worn-out bearing. Check capacity first, then the dough consistency (add water gradually if too dry). If the smell persists on future, lighter batches, contact KitchenAid support, internal issues need professional repair.
Dough climbs the dough hook and tangles at the top? You’re overfilling. Reduce dough volume by 20% and try again. If it happens with a light load, the dough is too sticky, add flour one tablespoon at a time.
The motor stops mid-knead. This usually indicates overload (too much dough or too-stiff dough). Never force the mixer to keep running: let it cool for 20 minutes before troubleshooting. Reduce the batch size next time.
Splashing everywhere? Start on speed 1 with the splash guard in place. Most splash is user error from starting too fast or overfilling. The splash guard is essential, not optional. Common kitchen appliance tips from The Kitchn often cover mixer hacks and troubleshooting that solve problems before they require service calls.