A solid kitchen sink cabinet is the backbone of your entire kitchen setup. It anchors your workspace, provides essential storage for everything from cleaning supplies to dishware, and handles constant daily traffic and moisture exposure. Whether you’re renovating an older kitchen or upgrading your current setup, understanding how to choose, install, and maintain the right kitchen sink cabinet makes the difference between a project that serves you well for decades and one that deteriorates within a few years. This guide walks you through the practical decisions and steps to get it right the first time.
Table of Contents
ToggleKey Takeaways
- Choose kitchen sink cabinet materials based on moisture resistance—solid wood requires sealing, plywood offers better moisture protection than particleboard, and thermofoil is budget-friendly for humid kitchens.
- Secure your kitchen sink cabinet to wall studs using 2.5-inch screws every 16 inches and ensure the cabinet is level; improper installation leads to long-term damage and functionality issues.
- Prevent costly repairs by checking for leaks monthly, wiping spills immediately, leaving cabinet doors open after dishwasher use, and tightening hardware twice yearly.
- Maximize under-sink storage with pullout baskets ($40–$150), two-tier shelving at least 10 inches from the floor for trap clearance, and door-mounted organizers to eliminate wasted space.
- Budget-friendly upgrades like refinishing cabinet doors ($50–$150), replacing the sink ($80+), or installing a modern faucet ($100–$400) modernize your kitchen without full cabinet replacement.
Choosing the Right Kitchen Sink Cabinet for Your Space
Understanding Cabinet Styles and Materials
Kitchen sink cabinets come in two core styles: base cabinets (the standard 34.5 inches tall, 24 inches deep unit that sits on your floor) and apron-front or farmhouse styles that extend below the counter for a distinct look. Base cabinets are the workhorse, they fit under most 36-inch countertops and integrate seamlessly with your existing kitchen layout.
Material choice shapes durability and budget. Solid wood (oak, maple, cherry) resists moisture when properly sealed but costs more and requires maintenance. Plywood with veneer offers better moisture resistance than particleboard and costs less than solid wood. Thermofoil (vinyl-wrapped MDF) is budget-friendly and moisture-resistant, making it practical for kitchens with high humidity, though it can peel if damaged. Stainless steel or metal-frame cabinets work well in modern or commercial-style kitchens.
For the sink area specifically, the cabinet must handle plumbing penetrations and moisture. Look for cabinets with a solid or reinforced top frame where the sink mounts: avoid flimsy particleboard tops. Interior finish matters too, a sealed or water-resistant interior prolongs cabinet life. Many homeowners overlook this detail and regret it when particleboard swells from a slow leak.
Consider your cabinet door style. Shaker (simple, recessed panels) works with almost any kitchen aesthetic and hides fingerprints better than high-gloss finishes. Flat-panel (modern, minimal) suits contemporary spaces. Raised-panel (more ornate) fits traditional kitchens. The sink cabinet will be front-and-center, so choose a style you won’t tire of in five years.
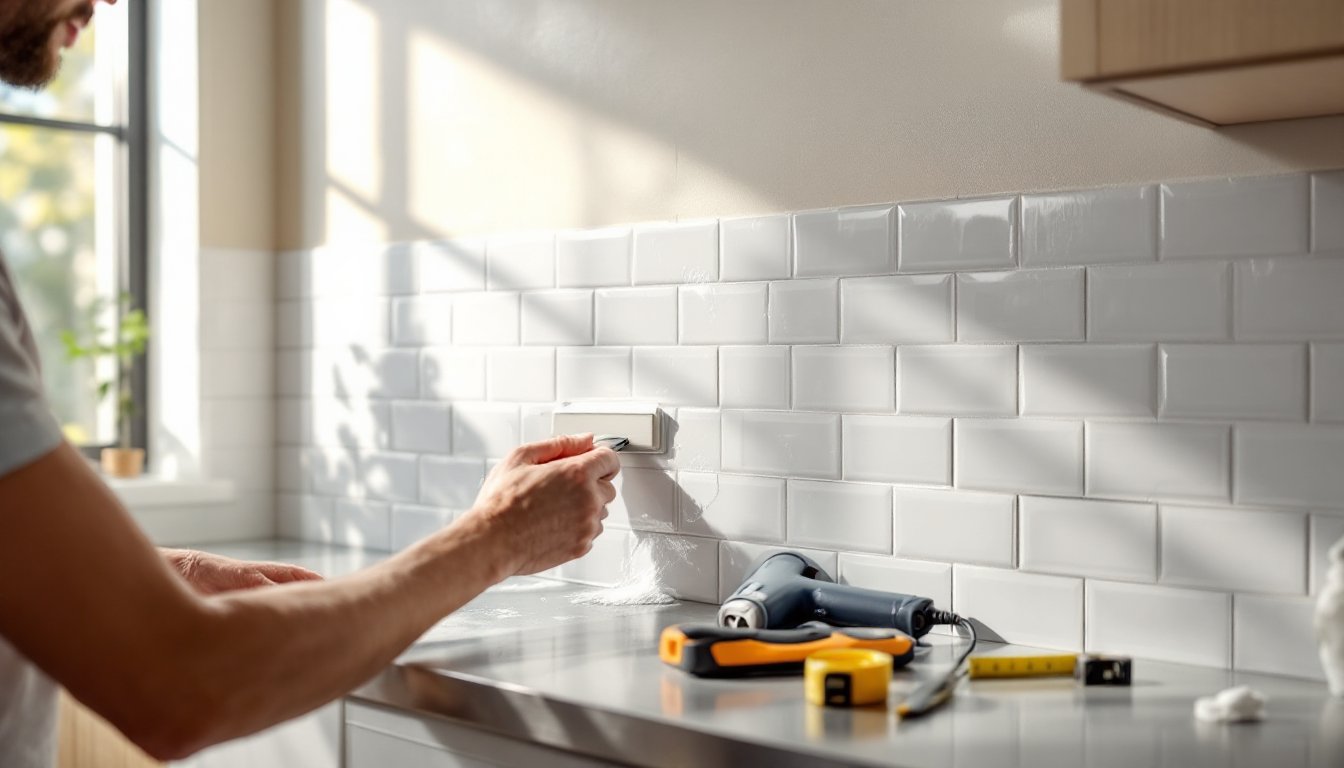
Installation Essentials: What Every DIY Homeowner Should Know
Installing a new kitchen sink cabinet requires careful planning. Most DIYers can handle it with basic tools, but plumbing rough-in work may demand a licensed plumber depending on your jurisdiction’s building codes.
Before you buy, measure the opening twice. Measure from the left wall stud to the right wall stud at the toe-kick (bottom), mid-cabinet, and counter height. Openings are rarely perfectly square, so take the smallest measurement to determine cabinet width. Check for level with a 48-inch level: floor slopes often cause problems if ignored.
Prepare the site. Remove the old cabinet (shut off water lines first), and inspect the wall and floor underneath. Look for evidence of past leaks, soft particleboard or staining means you’ll need localized floor or wall repair before installing the new cabinet. Level the floor with shims under the cabinet feet if the slope exceeds 1/4 inch over 10 feet.
Secure to studs, not just drywall. Locate wall studs with a stud finder and fasten the cabinet’s rail (the back support structure, usually 1.5 to 2 inches tall) using 2.5-inch wood screws into studs every 16 inches. This distributes the weight of the sink, water, and contents across the structure. If studs don’t align with your cabinet, you’ll need a ledger or additional blocking, not glamorous, but necessary.
Install the sink and faucet carefully. Most drop-in sinks are mounted on a wooden rim or support rail inside the cabinet. Farmers sink or apron-front cabinets require careful support because they carry extra weight in front. Consult the cabinet and sink manufacturer’s specs for load ratings. Plumbing requires careful slope (1/4 inch per foot down toward the trap) and proper venting per local IRC or plumbing code. A slow-draining sink often points to a venting issue, not a clogged line.
Seal gaps. Use silicone caulk (not latex) where the cabinet meets the wall and countertop, water finds every gap. Leave the underside open for cleaning access and moisture escape.
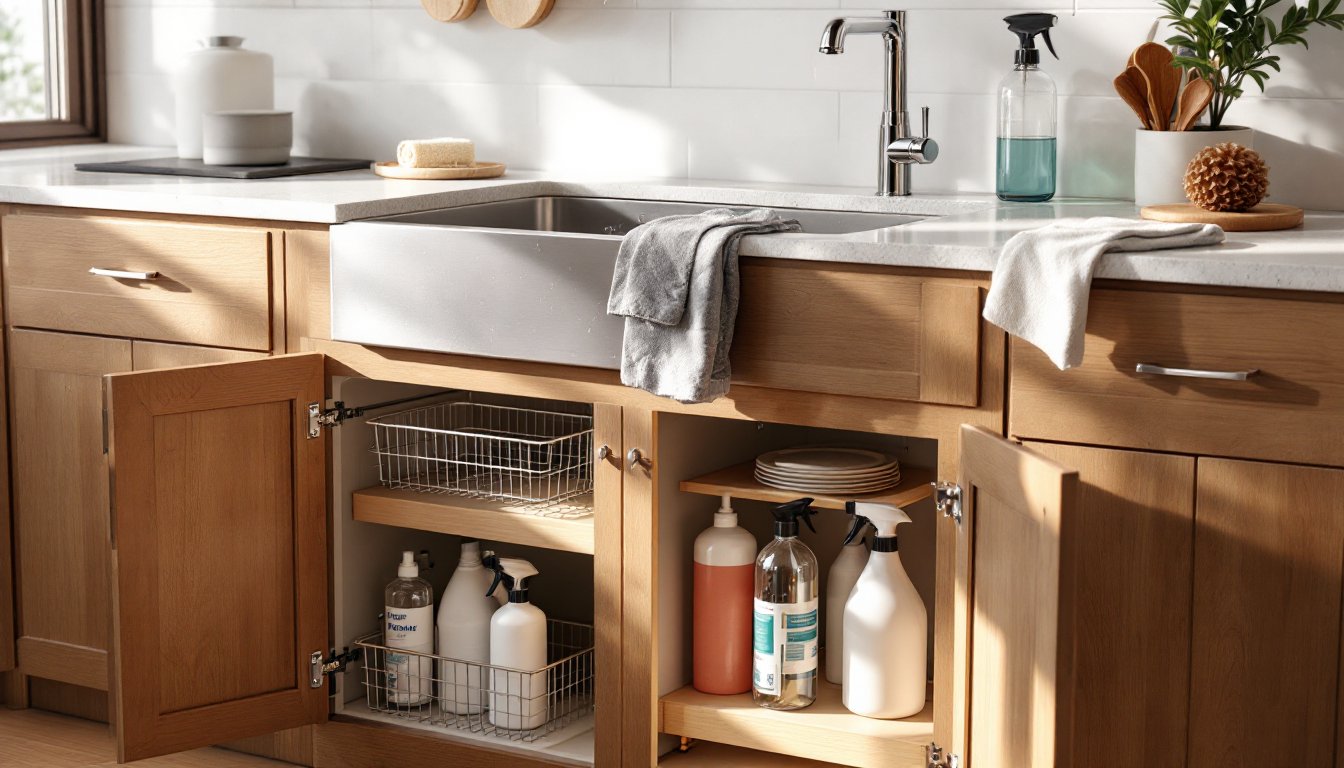
Maximizing Storage and Organization Under Your Sink
The space under the kitchen sink is prime real estate, but it’s often wasted on clutter. Smart organization starts with understanding what actually belongs there: dish soap, sponges, cleaning supplies, and maybe a small waste bin. Resist the urge to cram in everything.
A pullout basket or sliding drawer is one of the best upgrades you can add to an existing cabinet. These retrofit units bolt to the cabinet interior and let you access items at the back without contorting yourself. They’re typically 12 to 18 inches wide and cost between $40 and $150 depending on material and mechanism quality. Stainless steel or powder-coated wire holds up better than plastic.
Two-tier shelving divides the cabinet vertically, doubling usable shelf space. Position the lower shelf at least 10 inches from the floor to allow for trap clearance (the curved pipe that holds water and prevents sewer gases). Common mistakes include installing a shelf too low and then having to remove it when plumbing needs repair.
Use mounting hooks or adhesive strips on the inside of cabinet doors for spray bottles, cloths, or hanging storage bags, this keeps the floor space clear. Transparent door-mounted organizers let you see what’s inside without opening the cabinet.
Don’t overlook vertical dividers for storing flat items like cutting boards or baking sheets. Angled racks work well for plastic container lids. The key is giving every item a designated spot so you’re not hunting for the sponge at 6 a.m. before guests arrive. According to kitchen cabinet storage solutions, most homeowners waste 40% of available space through poor organization.
Maintenance Tips to Keep Your Sink Cabinet in Top Condition
Moisture is the enemy of kitchen sink cabinets. Establish a simple maintenance routine to catch problems early.
Check for leaks monthly. Examine the underside of the cabinet and around the trap with a flashlight. Water stains, soft wood, or mold indicate a leak. Common culprits include loose sink mounting bolts (tighten every six months), cracked caulk around the sink, or faulty supply line connections. Replace compression sleeves or washer-type fittings if you notice slow drips, they’re inexpensive ($2 to $5) and prevent larger damage.
Keep the cabinet dry and ventilated. Wipe up spills immediately, and never store soaking pans or wet rags inside overnight. Leave the cabinet doors open for 30 minutes after running the dishwasher to allow steam to escape. This simple step prevents swelling and mold growth in veneer or particle board.
Clean interior surfaces quarterly. Use a damp cloth with mild soap and dry thoroughly. For stubborn stains or mild mold on untreated surfaces, a 1:1 vinegar-to-water solution works without damaging finishes. Don’t use harsh abrasive scrubbers that can gouge protective coatings.
Inspect and tighten hardware twice yearly. Cabinet hinges and door hardware loosen with use. A 1/8-inch Phillips screwdriver usually does the job, just snug them, don’t over-tighten. Loose hinges lead to sagging doors and uneven cabinet appearance.
If your cabinet has a wood interior, check for pest activity (tiny holes or droppings). Kitchens are attractive to insects, so catch infestations early. Sealed or treated interiors offer more resistance, which is another reason to invest in higher-quality cabinets upfront.
Budget-Friendly Upgrades and Renovation Ideas
You don’t need to replace the entire cabinet to improve its function and appearance. Strategic upgrades can breathe new life into an older unit for a fraction of the replacement cost.
Refinish cabinet doors by sanding, priming, and painting or staining. This is a weekend project that costs $50 to $150 in materials. Use a 120-grit sandpaper to dull the existing finish, then apply bonding primer (designed for glossy surfaces) before paint. Acrylic cabinet paint resists moisture better than latex. New hardware, handles and knobs, costs little but transforms the visual impact. Choose corrosion-resistant options like stainless steel or brass for sink cabinets.
Replace the sink itself if the existing one is chipped, stained, or outdated. Drop-in sinks range from $80 for basic stainless steel to $300+ for specialty materials. Undermount sinks (where the basin sits below the counter) are trendier but require more installation precision. According to resources at The Kitchn, swapping sinks alone can modernize a kitchen without major structural work.
Add open shelving if your cabinet interior permits. This works best if plumbing is confined to one side, leaving usable shelf space on the other. Floating shelves add visual lightness and serve as display space for attractive dishware or small plants.
Install a new faucet. Modern pull-down or pull-out faucets cost $100 to $400 and make daily tasks easier. Look for models with a high arc (tall spout) if you regularly fill large pots. Ensure your cabinet’s counter opening accommodates the faucet’s footprint, most standard three-hole sinks fit common faucet sizes, but confirm before ordering.
For thorough design inspiration and product options, kitchen cabinet styles and designs showcase current trends and practical configurations. These upgrades address both function and aesthetics without requiring a full renovation budget.
Conclusion
A kitchen sink cabinet that’s properly selected, installed, and maintained serves as the foundation of a functional, long-lasting kitchen. Start by choosing materials suited to moisture exposure, secure installation to wall studs, and commit to regular maintenance. Small, proactive steps, caulking gaps, checking for leaks, tightening hardware, prevent costly repairs down the road. Whether you’re planning a full renovation or fine-tuning your current setup, treating the sink cabinet as a critical component rather than an afterthought pays dividends in durability and daily usability.