A large walk-in shower transforms a bathroom from purely functional to genuinely luxurious, and the appeal goes beyond aesthetics. These spacious enclosures offer accessibility for aging homeowners, easier cleaning, and the freedom to customize every detail. Whether you’re tackling a full bathroom renovation or upgrading an existing shower space, understanding the planning, materials, and installation process helps you avoid costly mistakes. This guide walks you through designing and building a large walk-in shower that works for your home and stays within realistic timelines and budgets.
Table of Contents
ToggleKey Takeaways
- A large walk-in shower boosts home resale value by recovering 50–70% of renovation costs, making it one of the top ROI bathroom projects.
- Proper measurements, drainage design, and waterproofing are the non-negotiable foundation of a large walk-in shower—skipping or rushing these steps guarantees costly water damage and leaks.
- Pre-sloped fiberglass pans and liquid-applied waterproofing membranes eliminate the riskiest DIY mistakes in shower construction, especially when floor slope is critical.
- Code compliance varies by jurisdiction; always consult your local IRC and building department before starting a large walk-in shower project to avoid permit rejections.
- Professional glass installation for frameless enclosures is worth the cost—misalignment of even 1/4 inch causes water leakage and binding doors, making precision work essential.
- A DIY large walk-in shower takes 3–6 weeks of evenings and weekends, while professional installation costs $5,000–$15,000+ and completes in 2–4 weeks, so choose based on your time and skill level.
Why Large Walk-In Showers Are a Smart Home Investment
Large walk-in showers add both practical value and resale appeal to a home. Unlike enclosed tubs or cramped shower stalls, they provide genuine space to move and accommodate multiple people or mobility aids without awkwardness. Real estate data consistently shows that updated bathrooms rank among the top ROI projects, bathroom renovations recover 50–70% of their cost at resale, and a spacious, modern shower is often the centerpiece homebuyers notice first.
Beyond the numbers, the daily functionality matters. A large shower means easier cleaning of the enclosure, no splashing water across the bathroom floor, and the luxury of morning routines that don’t feel cramped. If you plan to age in place or have family members with mobility challenges, the open layout makes accommodating grab bars, benches, and wheelchair access straightforward.
That said, be realistic: large walk-in showers cost more upfront than basic tile showers. Materials, labor, and sometimes permits add up quickly. If this is your first significant bathroom project, consider whether you have the time and skill to DIY portions, or whether hiring professionals for plumbing, waterproofing, and tiling makes sense. A quality large shower built right lasts 20+ years with minimal maintenance, making it a genuine investment, not a quick cosmetic fix.
Essential Planning and Measurements for Your Shower Space
Before ordering a single tile or glass panel, measure your bathroom space carefully and sketch a layout. Most builders work with templates or rough drawings: mistakes in this phase ripple through every other stage.
Start by measuring wall-to-wall in the area designated for the shower, noting any obstacles: plumbing fixtures, electrical outlets, windows, or door swings. Mark existing studs (typically 16 inches on center) and identify which walls are load-bearing or exterior walls (relevant for future ventilation). Take photos and label dimensions clearly.
Next, verify your existing plumbing supply lines and drain location. Moving them is expensive and sometimes impossible: designing around existing rough-in points saves thousands. If you’re moving plumbing, this is structural work requiring a licensed plumber and likely a permit.
Minimum Dimensions and Layout Considerations
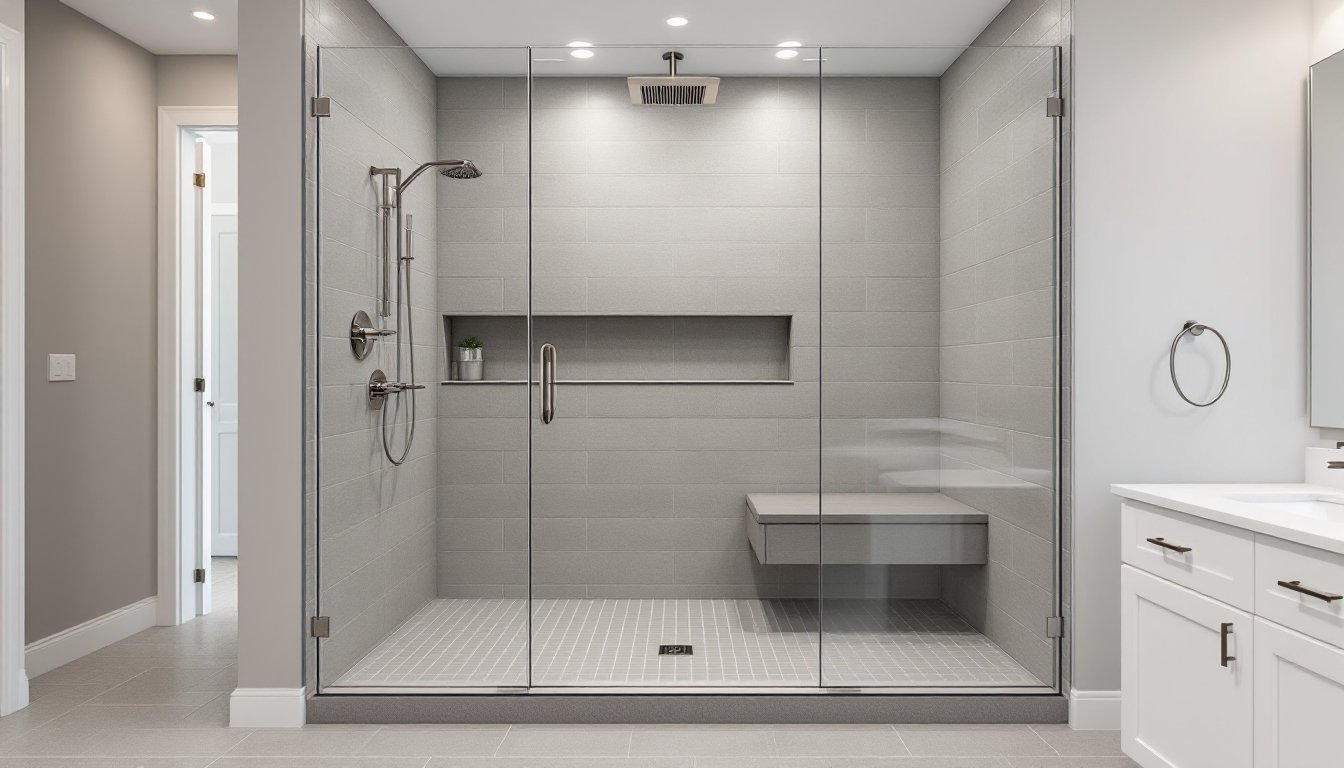
Building codes don’t mandate a specific minimum size for walk-in showers, but practical minimums exist. Residential code typically requires an interior shower space of at least 30 by 30 inches (like a standard stall), but “large walk-in” usually means 36 by 48 inches or bigger, often 42 by 60 inches for genuine comfort.
Layout affects usability more than you’d think. A 42-inch width (interior dimension) lets two adults coexist without contact. Depth varies: 48 inches feels spacious: 60+ inches accommodates a bench or built-in niche for supplies. Account for glass door swing (if any) and ensure at least 24 inches of floor space outside the enclosure for getting in and out without blocking bathroom traffic.
Consider the slope of the floor. All shower bases must slope toward the drain at roughly 1/8 inch per linear foot for water to flow properly. If your existing bathroom floor is nearly level, you may need to install a mortar bed or pre-sloped acrylic pan under your tile to achieve correct pitch, another reason to involve a professional if you’re unsure.
Consult your local IRC (International Residential Code) and any municipal amendments: bathroom codes vary by jurisdiction. Some areas require specific vapor barriers, ventilation CFM (cubic feet per minute), or structural provisions for grab bars. A quick call to your building department costs nothing and prevents permit rejections later.
Selecting Flooring, Drainage, and Waterproofing Systems
The flooring, drain, and waterproofing system are your shower’s skeleton. Failures here lead to mold, rot, and costly repairs behind the walls.
Drainage starts with the drain itself. Linear drains (long, slotted drains running across the floor) look modern and handle water faster than traditional center-mount drains, but they cost 2–3 times as much and require more precise floor slope. Center drains are proven, affordable, and forgiving if your floor pitch isn’t perfect. Choose based on aesthetics and budget.
The pan or base beneath tile matters enormously. Pre-sloped acrylic or fiberglass pans come with the correct slope built in, foolproof for non-professionals. Custom mortar beds (cement, sand, and waterproofing membrane) offer flexibility and integrate seamlessly with tile, but demand precision and experience. If DIYing, a pre-sloped pan is safer. If hiring, a mortar bed often looks better.
Tile selection depends on slip resistance and durability. Glazed ceramic or porcelain works, but matte or textured finishes reduce slipping better than glossy tiles. Aim for porcelain over ceramic in wet zones, it absorbs less water and resists wear longer. Grout should be epoxy-based or urethane-based, not unsanded cement grout, which wicks water and breaks down in constant moisture.
Preventing Leaks and Water Damage
Waterproofing separates a shower that works for decades from one that leaks within years. The hidden layers matter most.
Build your assembly from the subfloor up: subfloor (structural) → waterproofing membrane (critical) → mortar bed or pan → tile → grout and sealant. The waterproofing membrane is your last defense: without it, water seeps past tile and grout into the structure.
Use a liquid-applied or sheet waterproofing membrane rated for wet areas. Brands like Schluter, RedGard, and Hydro-ban are proven. Follow the manufacturer’s application steps exactly, most require overlaps of 6 inches between seams and proper curing time before tiling. Corners and seams are weak points: reinforce with waterproofing tape at inside corners (where walls meet the floor). A common mistake is skipping walls: they need waterproofing too, extending at least 6 inches above the showerhead.
Ventilation prevents moisture buildup that rots framing over time. Install a bathroom exhaust fan sized for the bathroom’s square footage, typically 100 CFM per 10 square feet. Duct it directly outside, not into the attic. Run it during and for 20–30 minutes after every shower.
Most DIYers can apply waterproofing membranes and tile, but if water damage is visible (soft drywall, black mold, or soft subfloor), call a professional before proceeding.
Glass Enclosures and Shower Door Options
Glass defines the shower’s look and affects function and maintenance.
Frameless glass enclosures (10–12mm tempered glass with minimal hardware) look modern and feel spacious but cost $1,500–$4,000+ installed, depending on size and custom angles. Water still pools at the bottom if not sloped correctly, and they show water spots and soap scum visibly. Semi-frameless designs reduce cost (aluminum frames on sides only) while maintaining the open feel. Framed showers (aluminum frame around the perimeter) are affordable ($500–$1,500 installed) but look dated and trap moisture around frame seals.
Hinged doors (swinging outward) work well for wide showers and save space inside the enclosure. Sliding doors suit narrower spaces but can jam with mineral deposits if not maintained. Walk-in showers without doors (open-plan) require careful floor slope and splash management: they work best in large bathrooms where water runoff won’t flood adjacent areas.
Glass thickness and treatment matter. 10mm tempered glass is standard safety glass that won’t splinter: anything thinner feels flimsy. Anti-scuff or rain-pattern treatments reduce visible water spots and soap residue. Frameless installations require clips or hinges rated for the glass weight, undersized hardware causes glass to separate from walls over time.
If DIYing, pre-assembled enclosures (frameless or semi-frameless kits from manufacturers like DreamLine or American Standard) are easier than site-built custom frames. Still, glass installation requires precise wall measurements, level mounting surfaces, and often a second pair of hands. Many homeowners hire glaziers for this step even if they’re DIYing the tile and finishing work.
Installation Tips for DIY Enthusiasts and Homeowners
Success depends on prep, tools, and honest assessment of your skill.
Start with plumbing and rough-in. Rough plumbing (supply lines, drain, and vent) must be done before walls close. If you’re moving existing plumbing, hire a licensed plumber, mistakes here are expensive and dangerous. If plumbing is already in place, verify the drain pitch and supply line locations before framing.
Frame the enclosure walls using standard 2×4 studs, checking plumb and level constantly. Install a waterproofing membrane on the entire floor and at least 6 inches up the walls before laying mortar or installing the pre-made pan.
Pro tip for DIYers: Use a pre-sloped fiberglass pan over a custom mortar bed. It’s faster, requires less skill, and eliminates the trickiest part of shower building, nailing the correct slope.
Tile installation is labor-intensive but achievable for beginners. Use thinset mortar (not mastic), mix it to peanut-butter consistency, and apply with a notched trowel (size depends on tile size). Lay tiles from the lowest point of the pan upward, using spacers for consistent grout lines. Work in small sections before mortar sets. Grout within 24–48 hours, following the grout manufacturer’s curing time before introducing water.
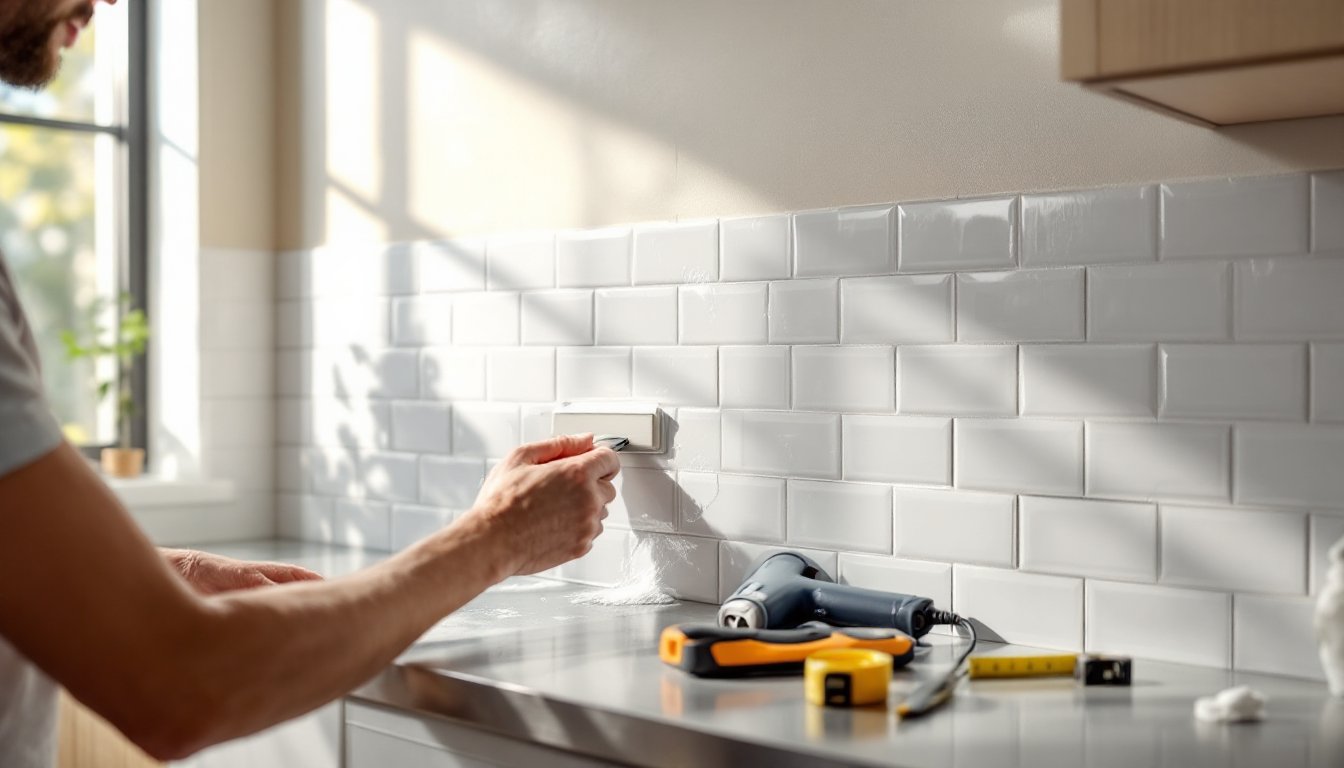
Wear goggles when cutting tile: wear dust masks when working with cement, mortar, or grout. Grout dust contains silica, which damages lungs over time. Gloves protect your hands from chemicals in mortar and waterproofing products.
Glass installation is where most homeowners call a professional. Measuring and mounting are unforgiving: misalignment of even 1/4 inch causes doors to bind or water to escape. If you’re confident with precision work and have a helper, frameless kits come with detailed templates. Family Handyman offers plumbing fixes and DIY tutorials that cover common bathroom issues and tool selection.
Final step: seal and paint. After grout cures fully (typically 48–72 hours), apply grout sealer to prevent staining and moisture absorption. Prime and paint walls and trim, paying attention to moisture control. Semigloss or moisture-resistant paint holds up better in bathrooms than flat or matte finishes. Resources like Remodelista showcase bathroom remodel inspiration and curated product guides that help you choose finishes and fixtures that match your design vision.
Timeline reality: A DIY large walk-in shower typically takes 3–6 weeks of evenings and weekends, depending on your experience and whether you’re tackling plumbing. Professional installation (plumbing, tile, glass) takes 2–4 weeks and costs $5,000–$15,000+ depending on finishes and complexity. Be honest about what fits your schedule and skill level.
Bringing It All Together
A large walk-in shower is a meaningful upgrade that rewards planning, patience, and respect for the details. Whether you’re managing the entire project or orchestrating different trades, the foundation, drainage, waterproofing, and slope, is non-negotiable. Handle these correctly, and your shower stays watertight and functional for decades. Rushing or skipping them guarantees costly problems. Start with realistic measurements, research your local codes, and don’t hesitate to hire professionals where skill and experience matter most. Walk-in shower ideas and designs on Houzz offer visual inspiration when you’re refining your design vision. The payoff, a beautiful, functional shower that enhances daily life and home value, is well worth the effort.